
Use VSCode for C++ Coding Interview Prep
Intro
Modern coding interview websites have amazing supports for you to focus on only solving the problems, not dealing with compiler settings, or library includes, or even test cases. Test Case part would be the most important and encouraging key feature that which platform you would pick.
But then, what if you are preparing a coding interview which happens to be in other platforms? Or what if you don’t have a proper support of comprehensive intellisense?
The most common case for Korean engineers would be the Bakjoon Online Judge website. It has lots of problems to solve, good language supports, random competitions, etc, which is pretty nice.
But it has a barebone code submit system compare to other modern online coding website. You are literally writing to the nodepad and you need to handle input values as well. Well I mean it is not terrible. Some offline contests want you to handle inputs as well.
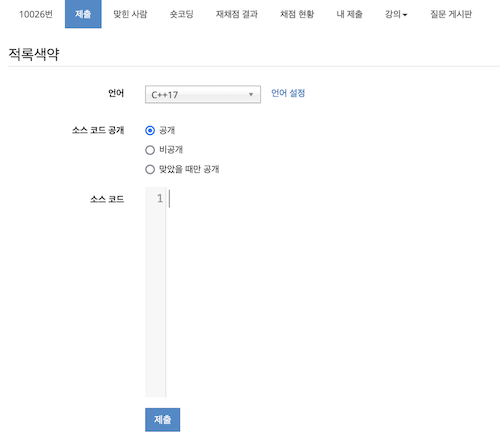
It still doesn’t change that you need to write extra repetitive code to solve a problem which is… generally not your concern.
I was struggling with this problem as well. Even though I like the websites and its problem sets, dealing with bunch of Ctrl + C & V on test cases was not fun. Furthermore, if you are preparing a second interview followed by the first coding interview, you even don’t have any platform to practice of previous questions (there is a chance that you will be asked to write the same code in live). You need to write your own test program.
Your last bullet here is your local development. Write yourself, test yourself, and finish yourself without anything’s help.
This article will cover how you setup the VSCode for simple C++ compiler, install gtest, and setup the whole test cases.
Action
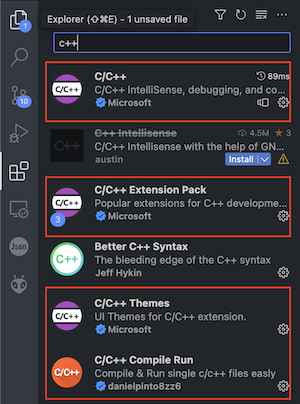
1. Install C++ plugins
I will assume you already have g++ compiler.
We will install the basic plugins for C++ and as an extra, will install C/C++ Compile Run
2. Install gtest using homebrew
In this article, I would not cover about cmake. We will savage gtest using homebrew, easy-peasy.
brew tap ros/deps
brew install gtest
ROS package has gtest included. It is not the latest version but good enough to use. Currently, I was able to download gtest 1.7.0 version.
Once it has done, you can find it under /opt/homebrew/

We are going to include this path into our vscode setting.
3. Put gtest path into the action
We will change our cpp properties first so that our intellisense can find gtest.
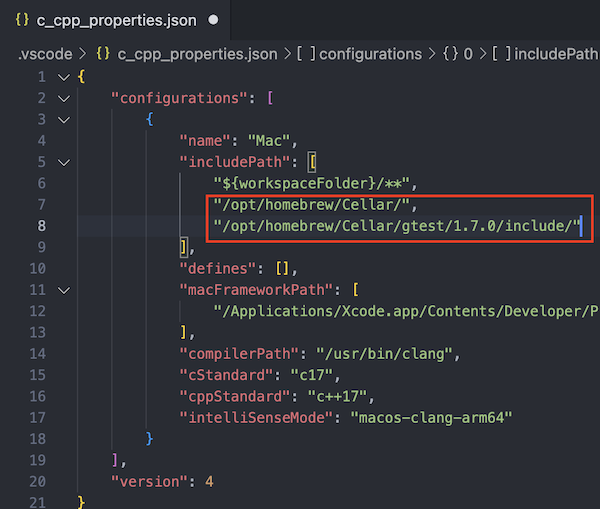
Add under includePath
"/opt/homebrew/Cellar/",
"/opt/homebrew/Cellar/gtest/1.7.0/include/"
And now, we need to link them with our compile setting.
If you go into Settings -> search for compiler
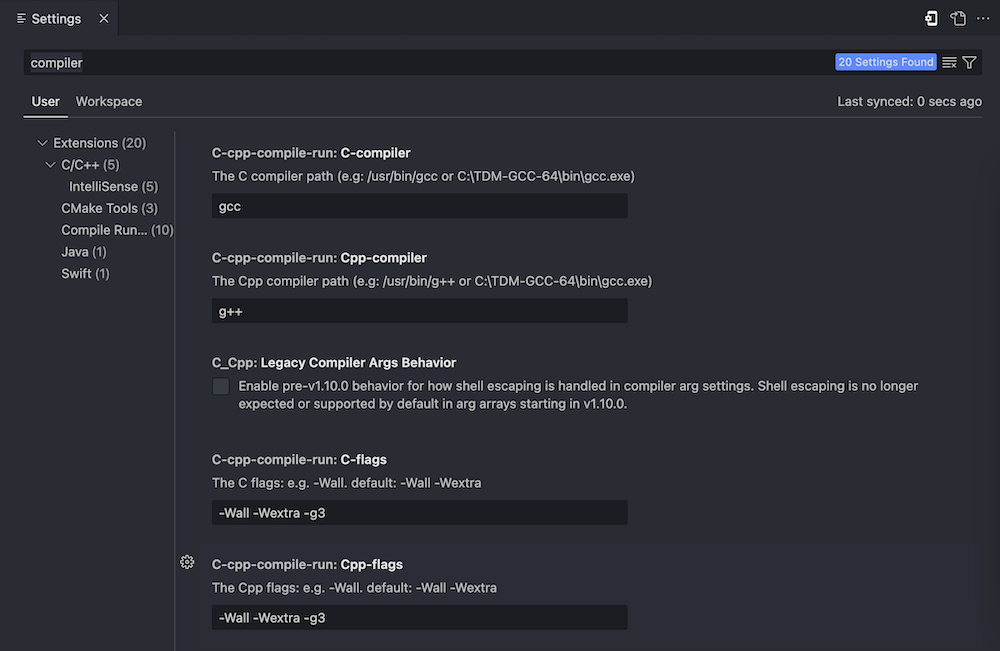
You will be able to see “Cpp-flags”. This is what the plugin will pass to the g++ compiler when you run.
I’m going to change the options to
-Wall -Wextra -g3 -std=c++17 -I/opt/homebrew/Cellar/gtest/1.7.0/include -L/opt/homebrew/Cellar/gtest/1.7.0/lib/ -lgtest
- -std=c++17 : set my c++ standard to C++17. You can use C++11, C++14, C++20, etc.
- -I/path/to/include : Add gtest’s include path here
- -L/path/to/lib : Add gtest’s lib path here
- -lgtest : Link gtest.
4. Write a test
You need to setup the main function as below.
#include <iostream>
#include <gtest/gtest.h>

using namespace std;

namespace
{
    TEST(ClassName, Test1)
    {
        int a = 10;
        int b = 20;

        ASSERT_EQ((a * b), 200);
    }
}

int main(int argc, char **argv)
{
    ::testing::InitGoogleTest(&argc, argv);

    RUN_ALL_TESTS();
}
You need to call InitGoogleTest() with parameters but you don’t have to use them particulary.
And write a test case using TEST() under different namespace for an easy of use.
Now, let’s compile and run.
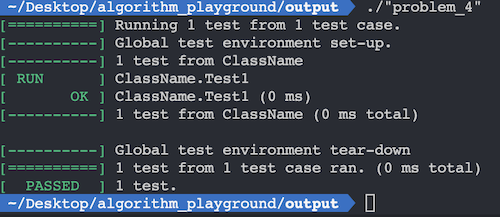
If your test cases are successful, you are all set!
Leave a comment